How to Make Custom-Fit Bras & Lingerie
If you’ve ever looked at the lingerie racks and thought “I wish this fit me perfectly,” making your own custom-fit bras and lingerie can be a wonderful and rewarding hobby. Whether you’re stitching with a friend on weekly virtual meet-ups, or simply working solo in your spare time, the journey from fabric roll to bespoke lingerie is very doable. Below, we’ll walk through why people take this on, what you’ll need, and how to get started—written from the perspective of someone who’s excited but realistic about the learning curve.
Why make your own lingerie?
- Perfect fit. Ready-to-wear bras often compromise because of standard sizing. When you sew your own, you can cater to your shape—band widths, strap positioning, cup depth—so everything sits just right.
- Creative control. You pick fabrics, trims, lace, embroidery, lining, hardware. Want blush pink silk under lace, with embroidered details and adjustable straps? You can do it.
- Skill development & satisfaction. There’s a lot going on: pattern-making or adapting, working with delicate/stretch fabrics, precision seams, fitting adjustments. It’s a craft that builds skills and gives a tangible sense of achievement.
- Budget (eventually). While the first few might cost more (because of learning materials, kits, premium fabrics), over time you may find you’re getting “designer” level fit and design without the designer price tag.
What you’ll need to start
1. Basic skills & mindset
Since lingerie involves curves, stretch fabrics, small seam allowances, and specialised hardware, having some prior sewing experience helps. Even if it’s just from a GCSE textiles class years ago, that’s enough. Be ready for a few trial runs. As one maker put it:
2. A pattern (or kit) for beginners
Choose a pattern designed for lingerie or bralettes. For example, some makers recommend starting with easy items like panties or a simple bralette rather than going straight to a complex underwire bra.
3. Fabric & notions
- Fabrics: Choose suitable lingerie fabrics: stretch mesh, power net, delicate lace overlay, silky knits, silk blends. One commenter said: “My go-to places for fancy fabrics are Mood fabrics and Etsy, tons of fine silks, tulle, modal, etc.” Reddit
- Notions/hardware: Elastics, underwires (if you’re going down that route), rings/sliders, bra hooks/eyes, lace trim, specialty needles, and a machine that can handle small stitches and stretch fabrics.
- Budget-friendly sourcing: Since you live in the UK and prefer online, check UK-based suppliers (some makers point to UK or EU suppliers that ship reasonably). Starting kits may save some cost by bundling the essential hardware.
4. Fitting & adjustments
Understanding how bra fit works is essential. A great bra isn’t just pretty—it sits properly on your body: band parallel to the ground, underwire or cup edge at the breast root, straps neither falling off nor digging in. 维基百科+1
Resources such as pattern maker websites show how to mould a shape (a “body cast” or mould) for truly customised patterns. patternmaking-classes.com

How to get started: Step-by-step
Step 1: Set your goal & level
Decide what you want to make and how often you’ll meet with your friend. For example: one evening per week you both embark on a shared project—start with a simple bralette or boyshorts, and set a target: “By 3 months we’ll make a wired bra.” That gives momentum.
Also decide your budget: fabrics, trims, tools. Since both of you live apart, pick suppliers that ship to UK (and maybe split a bulk order so you both get identical fabric at a good rate).
Step 2: Choose your first project & pattern
Start simple. As other makers recommended:
- Make a pair of panties or a half-slip. No complex hardware, minimal pieces.
- Then move to a triangle bralette (no underwire, simple band).
- Only later tackle a wired structured bra.
Use a beginner-friendly pattern from a trusted designer or resource. Read up on which patterns fit your bust size and style preference.
Step 3: Fabric and supply shopping
Pick a fabric colour and texture you both like (so you can compare results and share notes). Choose stretch mesh for lining, lace or soft broadcast fabric for overlay or shell. Buy a mid-budget elastics/bridal trimmings set—since you’re learning, avoid the ultra-premium fabrics yet.
Order supplies together (or at same time) so you can talk through shipping, delivery, “oh this elastic is nicer than I thought,” etc.
Step 4: Make a toile (mock-up) / pattern fitting
Before committing to your “good” fabric, use a plain budget fabric for your first version. This lets you check fit, seam placement, band snugness, strap position. Many makers do this multiple times:
Step 5: Sew the final version
Once the mock-up fits well: cut into your nicer fabric. Use careful sewing techniques:
- Use smaller seam allowances (lingerie often has narrow seams to avoid bulk).
- Work with stretch fabrics: use the right machine needle, allow for fabric recovery.
- Edge finishes matter: lingerie often uses picot elastic, narrow lace trims, delicate top-stitching.
- If you’re doing underwire: ensure wire fits the root of your bust, secure ends safely, and stitch channel well.
Step 6: Evaluate & learn
After wearing it for a day: ask yourself and compare with your friend:
- Is the band comfortable yet firm? Does it stay parallel across the back?
- Are the straps comfortable and not slipping?
- Does the cup contain without bulging or gaping?
- Can you move, stretch, lean without the bra shifting or digging?
Document what you’d do differently next time. Each version teaches you something.
Shop the Best Custom Lingerie from Kstom.com
Tips & encouragements for your virtual sewing duo
- Keep a sewing journal: Take a photo at each stage, note adjustments, fabric used. Over time you’ll have your own reference book.
- Set mini-goals: For example: “This week I’ll practise attaching picot elastic,” or “next week we’ll try strap adjustment”.
- Share fabrics if possible: Order the same fabric or share shipping, so you both are working with the same base—fun when you compare results.
- Seek inspiration & community: There are sub-reddits like r/MAKEaBraThatFits dedicated to bra-making where people share fit issues, patterns and fabric sourcing. Reddit
- Be patient with bras: One commenter put it well: “A bra is more structured than say activewear… But it’s possible even for a beginner.” Reddit
So don’t rush into complicated designs until you’ve sewn simpler ones. - Budget wisely: As you said your budget is limited, so invest smartly:
- Use a basic lining fabric early (less expensive).
- Buy notions in bulk or from UK suppliers to save shipping.
- Reuse hardware (rings, sliders, hooks) if you upgrade later.
One maker noted: “Theoretically this is an area where you can save money… but the start-up costs are high.” Reddit
-
Product on sale
 Mesh Babydoll Sets Floral Delicate GarterOriginal price was: $21.99.$19.79Current price is: $19.79.
 -
Product on sale
 Loveheart Embroidery Lace Transparent Bra and pantyOriginal price was: $19.99.$17.99Current price is: $17.99.
 -
Product on sale
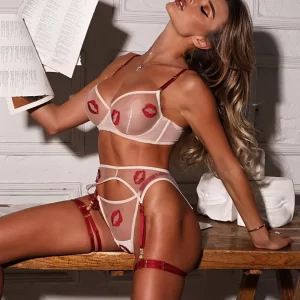 Sexy Lips Embroidery Transparent Bra Garter Lingerie SetsOriginal price was: $19.99.$17.99Current price is: $17.99.
 -
Product on sale
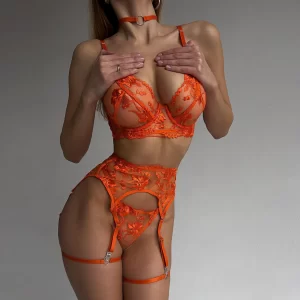 Orange Lace Floral Perspective Embroidered Bra With ThongOriginal price was: $19.99.$17.99Current price is: $17.99.
Shop the Best Lingerie from Anesidora
Next steps
Since you already have the idea of weekly virtual sewing sessions, here’s a checklist to get going:
- Choose your first two patterns (one simple, one intermediate) and share links with your friend.
- Order sample fabrics and trims together, with at least one budget lining and one “nice” overlay.
- Decide a date for your first sewing meet-up: perhaps a “pattern prep & fabric cut” evening.
- Create a shared document where you both log fabric type, size, pattern alterations, progress photos.
- Assign yourselves a “mini-task” each week: e.g., “This week I’ll practise attaching lace,” “Next week I’ll experiment with strap slider placement.”
Final thoughts
Making your own custom-fit lingerie is both a creative adventure and a technical craft. You’ll blend artistry (colour, lace, design) with engineering (fit, support, fabric behaviour). With your weekly virtual sewing buddy rhythm, limited budget but strong motivation, and a smart roll-out plan (start simple, learn fast, iterate), you are very well placed to succeed.
You may stumble—perhaps the first mock-up band rides up, or straps slip—but each one becomes a learning opportunity. The thrill of wearing something you made, that fits you perfectly and reflects your taste, is unbeatable.
Check More DIY Sex Toy Ideas Here